192.168.0.250 is the IP address of the router that the computer connected to a network will use for sending data requests over the web. The router also has a public Internet Protocol address.
It is a private IP address used by the router to set itself apart on the network. However, the IP address is not unique to the router. A majority of the manufacturers use a collection of IP address across the router range they offer. Be that as it may, a private IP address isn’t unique to a certain brand. Only the router owner needs to know this private IP address.
How to Find the IP Address?
An Internet Protocol address such as 192.168.0.250 is common. You can find your default IP address in the user manual of the router. Mostly, You can always find your IP address from your computer if you can’t find it anywhere.
Also check out these steps if you are running Microsoft Windows System:
- You will find a network icon in the lower right corner of the desktop. Click on it.
- Select the option Wi-Fi network to use the internet.
- After clicking the Wi-Fi Network icon you will see various information.
- Now click on IPv4 and there you will find your IP address which will be 192.168.0.250/login.
You can check out these steps if you are running Mac OS X:
- Click on the Apple menu.
- There you will find the option as system preferences. Click on it.
- Click the network icon from where you access the internet.
- There you will find your IP address.
In any situation, if you need a private IP address then you can just change it. If someone already changed your IP address from 192.168.0.250 then you need to reset it by default. But the only issue will be that this process will reset everything in the router.
Logging in to the Router at 192.168.0.250 IP Address
Plug into the router to get access to a basic Wi-Fi network. The Wi-Fi network might not be optimized for your use or you might not have a password set. For making changes to the Wi-Fi network, you have to log into the router using the IP address http://192.168.0.250. Even when the router has been set up by a professional or the ISP and you are content with how it is working, you would still have to use 192.168.0.250 login if something goes wrong.
Router login steps
So, it is always useful to know the access to the admin page of the router, in case you have to change something. Getting to that admin page isn’t as difficult as you think. Here is what you have to do:
- You will require a computer device that is internet-capable. A laptop or smartphone can also be used. Connect the computer device to the router. You can do it through a wired Ethernet connection or Wi-Fi.
- Open the browser while your system is connected to the router. Keeping the browser open, insert the IP address 192.168.0.250 in its search bar.
- Now, search 192.168.0.250 and this will take you to the login section of the admin page of the router. Now type the username and password of the router. After entering the credentials, you can access the router admin page’s menu.
In case you do not know the router login details, you will find the details at the base of the router. You can even find it on the website of the manufacturer. In case you have changed the details and do not remember them, reset the router to its factory settings. The login details are going to set back to default. However, you are going to lose the change you have made to the router before.
How to Configure a Router with the IP Address 192.168.0.250?
The http 192.168.0.250 admin page with the computer terms and numbers can be quite daunting. So, the ideal place to start is by altering the login details.
- Use the steps given above to access the admin page of the router. Scroll down to find the general settings menu.
- Enter the password you prefer. Use a password that is easy to remember yet difficult to guess. Irrespective of the changes you make, save the details.
While you are in the general settings menu, you need to change the router username.
How to Change the Local IP Address?
A popular setting that people change on the router is the local IP address. The router comes with two IP address. In case you want to change the 192.168.0.250 IP address, you need to note down a new address that you will need for accessing the router admin page.
- Go over to the router admin page. Now, look for the general settings menu or something with a similar name.
- Next, select ‘network settings’.
- Scroll through the menu until you come across ‘router settings’. Type the IP address, here.
- When done, save the changes.
Change the Name and Password of the Wi-Fi Network
There are various settings related to the router. If you have to change the SSID, follow the steps given below.
- Again, go to the general settings menu via 192.168.0.250/admin.
- Choose the wireless settings option.
- In the SSID field, you have to type the Wi-Fi network name you prefer.
- When done, save the changes.
In case you want to change the Wi-Fi password, the option is going to be the same as the SSID. Choose the Wi-Fi network password option and enter the password you like. With secure internet, you need to explore further. For instance, you can set parental controls or optimize the network.
Setting Up TP-Link Wi-Fi Repeater via WPS
- Switch on the TP-Link Repeater and wait for the light to remain unchanged.
- Now press the WPS button of the router for exactly three seconds.
- Now press the same button on the repeater for the same time.
- While you press the buttons the devices try to communicate and establish a strong and a secured connection.
- As the process is complete, now you can place the repeater at a point where the signal is the strongest.
Setting Up TP-Link Wi-Fi Repeater Manually
Plugin the repeater into a socket to power it up. Now follow the below step carefully.
- Connect your TP-Link Wi-fi Repeater to the system with your Wi-Fi or the Ethernet Cable.
- Open your browser then type tplinkrepeater.net or you can type your IP address which is http://192.168.0.250.
- Now log in with the default username and password which is “admin”.
- Follow the steps that you need to fill in to set up the repeater.
Resetting the TP-Link Range Extender
Now let’s reset the TP-Link Range Extender. Primarily two methods can help you. Let’s check them out.
Method 1
You can always go with the first method if you have a reset button at the back of the device. Follow the below
- Switch on the TP-Link Range Extender.
- After locating the reset button, press and hold it for exactly three seconds.
- Immediately release the button as the device will reboot.
- The extender will reset to do the factory default settings. While the extender is rebooting, you will find the LED lights flashing. Now you can also access the admin panel with the username password as “default” and make the desired changes.
Method 2
If your TP-Link Range Extender doesn’t come with a reset button then go for this method. They do come with a reset option but you will need a thin pin to reset the device. This is provided as a hidden reset option. For resetting the device you need to insert the pin in the hole and press it for exactly 10 seconds. After pressing it for 10 seconds you will see the LED lights flashing quickly and gradually becomes normal. Now your TP-Link Range Extender is rebooted.
Setting up the TP-Link Range Extender
Switching on the Extender
Find an electrical outlet near the host router and plug the extender. Wait till the LED light is solid on.
Establishing a Connection with the Host Network
You can easily connect your extender with the host network by two methods. We will also talk about the first method which is WPS and then the second method which is through the browser. The first method which is via WPS is easier to connect to the host network. It is better if you use this method else you always have the second option which is via browser.
Method 1
- Find the WPS button on the host router. The button is located behind the device. Press it and as well as press the button on the extender. You need to press the TP-Link Range Extender button within two minutes.Tip: There can be times when the IPS or the Internet Service Provider disables the WPS option and in such case, the connection will fail.
- When you see the LED to solid on then it indicates that the connection is established. If this process doesn’t work out for you then you can opt for method 2.
- You can also use the same SSID which is of the host network or just add _EXT at the end of the name. Also, the password will be shared.
Tip: As the performance may be affected due to the distance between the host router and the TP-Link Range Extender, it is always recommended to place the extender accordingly.
Method 2
Wirelessly connect the extender to your computer.
Tip: Always find the SSID or the network name which is also mentioned on the label of the TP-Link Range Extender.
- For the users who are using Microsoft Windows:
Remove the Ethernet wire from the system if connected.
At the lower right section of the desktop, you will find the Wi-Fi icon. Click it and connect to the TP-Link_Extender. - For the users who are using Mac OS
Disconnect your Ethernet wire from the system.
Find the Wi-Fi icon on the upper right section of the desktop. Click it and connect to the TP-Link_Extender.
You can also follow the Quick Setup Wizard to connect the host router to the extender.
- Open your browser and go to http //tplinkrepeater.net or you can type your default IP address 192.168.0.250.
- Now you need to create a password and always remember to note it down somewhere safe. Then also click start.
- Now select the 2.4GHz frequency option and enter the new password. Keep in mind that it should not be the same
- You got both the options. Either you keep the default SSID or you can change it. After changing it click on next.
- Also check all the details carefully and then click on save.
- Usually, the password is the same as the host network but there may be times the password is different. You can use “admin” as a by default password and change it later.
Positioning the Extender
Follow the given steps to get the best signal of the TP-Link Range Extender:
- Find a socket in the Wi-Fi dead zone and plug in your Extender. It should be in the range of the host network.
The moment you also see the entire tower LED full lit, place it exactly there. If the tower LED light is less than 3 then try to find some other place.
Tip: If you find any signal interference then find a place that does not have any electronic or Bluetooth devices. - Devices such as baby monitors, Ovens can be the reason for signal interference.
For any other information about the device, you can check the TP-Link Range Extender Manual.
Private Vs Public IP Address
A private IP address such as 192.168.0.250 help the user to access the admin page of the router. As previously mentioned your router also has a public IP address. The public IP address is always assigned by the ISP or the Internet Service Provider the users don’t have much control. Whenever you browse a website or try to communicate to the internet, they will always see your public IP address and send you data packs accordingly.
If you want a public IP address that does not change then well you can have that too. These are called static IP addresses. They are usually for cloud servers and websites that need to stay online all the time.
There is some concern with the public IP address and that is security issues. If a person is having a public IP address they are in a risk to show their partial location. If any hacker tries to hack your public IP address then they can potentially create a user profile.
To stay safe from such attacks you can use a VPN or Virtual Private Network which can secure your connection. What VPN does is that it hides your public IP address and displays some random address to show a different country. Some routers also have a built-in VPN. For example, if your public IP address 192.168.0.250 then it will change your address and also hide your exact location.
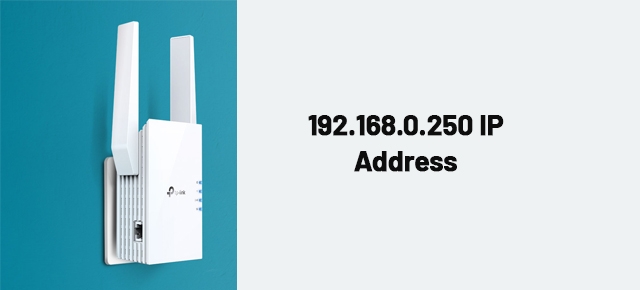
TP-Link Range Extender Review
TP-Link Range Extenders are the best choice for Wi-Fi dead zones in apartments and small-scale houses. It is easy to configure and set up the device and to do the factory settings. The best part about the TP-Link Range Extenders is that it doesn’t empty your pocket and it is well built. The only letdown that I observed is the average signal strength. With the max distance of 75 feet it good enough for small houses and apartments.
Read More
10.10.10.10 Default Admin Router Gateway
Top 10 best mesh Wi-Fi systems
192.168.10.1 Router Default Login