How Do Range Extender Install With Ap.Setup?
How Can I Access the Ap Setup Wizard With Ap.Setup?
Wavlink Wifi Extender Setup With Ap.Setup
Ap Extender Setup As An Access point Or Ap.Setup
MSRM US3000 Range Extender
Comfast Wifi Extender Setup
Comfast Extender Setup Using WPS
Can’t Access Ap.Setup?
Dodocool AC1200 Extender
Extender Mode
Access Point Mode
Ap stands for the access point. It means you can get the internet connection from a specific point. You can create an access point connection with the local internet cables. It allows you to connect your various Wi-Fi devices to the internet via a wired network. Sometimes, it acts as a gateway for your main devices. You can configure your host devices with the AP mode to amplify the WiFi of your ISP-provided hardware. Anyone can complete the access point configuration with the ap.setup. In addition, an Access point mode is also treated as a guest network to share its network with guest devices.
Ap.Setup
The ap.setup is the most crucial web address. You can use it for your access point and range extender configuration. It is the easiest way to configure your wireless range extender. Following are the access points or range extenders set up with the ap.setup. These extenders are:
- Wavlink wireless range extender
- Opticover WiFi Extender
- Rockspace Wireless Extender
- Coredy wireless range extender
- Kogan N300 AC Wi-Fi Range Extender
- N300 Wi-Fi Range Extender
- Victony WiFi Extender
- Galaway Wifi Extender
- 300Mbps Wi-Fi Range Extender RE300-Cudy Home
- ALC AMR300N Wi-Fi Repeater
- Comfast WiFi Range Extender
How Do Range Extender Install With Ap.Setup?
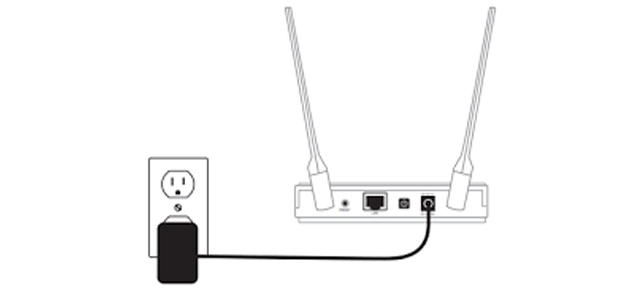
Before configuring your wireless range extender through the browser, first, you will finish the access point installation process. Following are the points given below to the range extender setup with ap.setup.
- First, connect your access point with the power outlet.

- You will use the power adapter to supply the electricity to your access point.
- Now, turn on the power of the access point.
- Wait for a little bit until the signal LED lights are not lit or stagnant.
- Make sure it works immensely.
- Now, connect the network of the access points on your Pc.
- You should use the SSID and security key printed on its label to connect to its network.
- Launch a browser and type in the URL field http://ap.setup.
- Sign in with your access point account with login credentials.
- Type the username or password to access your access point login page.
- After that, go to the Ap Setup Wizard.
- Follow the on-screen instructions and finish the access point setup with the ap.setup.
- Finally, connect your other devices to the network and enjoy superior internet services.
(Note: If http://ap.setup is not working on your browser, kindly clear or delete all the history from your browser. Also, keep your access point nearer to the host device.)
How Can I Access the Ap Setup Wizard With Ap.Setup?
Following are the major steps to configure your wireless repeater with an Ap setup browser address.
- Ensure your host devices (Wireless_AC network, Wirless_N, etc.) are hooked up with the ap repeater without any problematic error.
- Open on your laptop any Mozilla Firefox, Google Chrome, Safari, Microsoft Edge, Browser, Internet Explorer, etc.
- Search http://ap.setup or 192.168.10.1.
- Wait for a second, and the login page appears on your laptop window.
- So, you must log in to your account before it is necessary to configure your repeater.
- You will log in to your repeater and go to the access point wizard page.
- After this, you will configure the 5Ghz (433Mbps) and 2.4Ghz (300Mbps) frequency network bandwidth settings.
- Make sure your host device and repeater are nearer during the initial Ap.setup.
- Configure the wifi settings of your access point and allow you to use its network on any device. Eventually, save all configured settings.
Wavlink Wifi Extender Setup With Ap.Setup
The Wavlink wireless range extender is also compatible with ap.setup. You can use a setup to configure your wireless range extender. But before configuring it, you have to install your wireless range extender using the following points.
Steps for the Wavlink Wifi Extender Setup
- First, you will connect the Wavlink extender with a power supply by using a power outlet.
- Hooked up an access point with your current device to amplify its network.
- After this, ensure that both devices are connected immensely with each other.
- You can also verify the signal light, and it blinks with colorful light.
- After this, you have to use any wireless-enabled device to configure it with an ap.setup.
- Open your wireless computer settings and click on your Wavlink extender network.
- Connect it by using SSID (network name) and wifi password.
- Now, open internet explorer, and either you can use the Wavlink wifi extender Ip address or use an ap.setup. (Note: The ap.setup mostly grabs or easily accesses the wireless access points configuration page.)
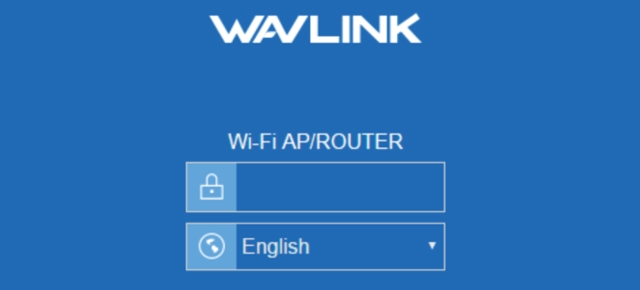
- Navigate https://ap.setup on the browser interface and log in to your Wavlink ap extender administration account.
- While the configuration page appears on your windows screen, you will click on the app setup wizard.
- Under it, click on the settings which you would like to configure.
- Follow the instructions that appear on the screen and apply the settings accordingly.
- You must save all the settings to finish the Wavlink extender setup.
Access Point | Ap Extender Setup As An Access point Or Ap.Setup
The Access Point allows you to amplify the network signal of the current device. You can easily expand and boost the current wifi through the range extender. It almost covers your home with all dead spots, without wifi signal regions, low signal locations, etc. The best way to use your existing wifi signal with the same speed without modifying the networking branding. Moreover, you can configure any access point with an ap.setup without any error. You will apply these points if you want to configure your Ap extender as an access point with an ap.setup.
Steps for the Ap Extender Setup As An Access point:
- In the beginning, start the working of your range extender.
- Connect it with your home’s main device network.
- After a while, the solid green light will blink on your wireless booster.
- Grab any Cat5 cable and an Ethernet cable.
- Use it to connect the host device network with the wireless booster.
- Ensure that both devices’ Ethernet points are connected.
- If both are suitable devices hooked up with suitable, your router and extender will flash a solid green light.
- Launch an administration page with an ap.setup or your ap wireless extender Ip address (192.168.10.1).
- Now, log in first and go on the configuration page successfully whilst you finish its login process.
- The Access point setup page allows you to configure the app extender as an access point. You will apply the settings as per the given instructions on the screen and save it.

MSRM US3000 Range Extender
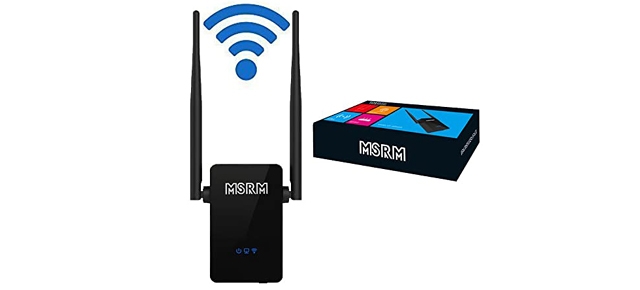
The MSRM US3000 Range Extender is more durable, smarter, and more worthwhile. It provides a seamless wireless network connection to more than one device. You can use it with an 802.11b/g/n wifi device to broadcast the same wifi signal. Be free when your home wifi signal weakens obstacles. The MSRM US3000 Range Extender setup is too easy. Moreover, it makes your existing wifi overall strength more immense. Through the US3000 WiFi Extender, you can get the 300 Mbps speed into your various devices (Android phones, laptops, computers, tablets, game consoles, and even notebooks). It is a highly portable and incredibly suitable mini design. Hence, you can use it anywhere comfortably. If you want to know how to set up the MSRM extender, then follow the points given below in order.
Steps for the MSRM Wifi Extender Installation
- Take out the MSRM extender from the package box.
- Also, collect all the available accessories.
- Now, plug it directly into a stable source of power.
- Make sure you have plugged in the extender right in the middle of your router and place it in the exact location where you exactly need a network.
- Push the power button and check that the solid LED light is blinking.
- Now, you have to use either your cell phone or laptop to set it up.
- On your laptop, type settings in the search bar of Windows.
- After that, find and click on Wireless & Network Settings.
- After this, you only have to go to the WiFi settings and choose the name of your extender from the list of current WiFi networks on the screen.
- The MSRM network name could be demonstrated as Wireless-AC or Wireless-N.
- You have to click on the network name of your extender and connect it.
Steps for the MSRM US3000 Range Extender Setup with browser
- But it will connect within 10 minutes with your computer but show you no network.
- To connect to the internet, first, you have to connect it with the router, then first of all connect to the router’s network.
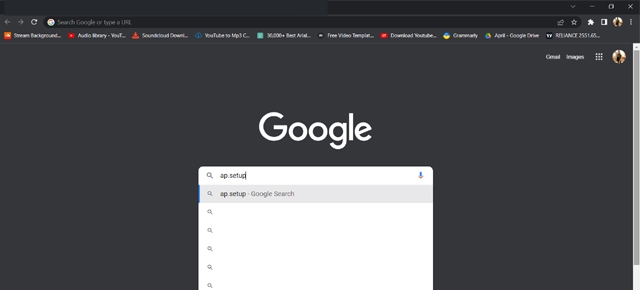
- Open a browser and search ap.setup in the search bar.
- The MSRM extender’s login panel will open on your browser screen, click on the login button and enter your extender’s login details.
- After login, the administration page of the MSRM extender will open, you have to connect your router with your extender.
- Follow the given instructions on the screen and configure your wireless extender. It will be connected successfully to your laptop.
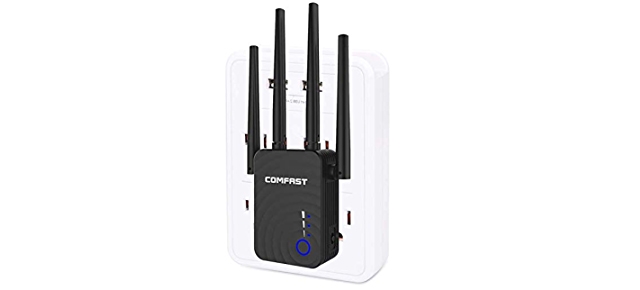
Comfast Wifi Extender Setup
The Comfast Extender as its name suggests is designed to extend your host device’s wifi signal network. It works completely unlike all other range extenders. Because its working capacity is much higher than all other devices. It can connect multiple devices at the same time without any speed reduction. You can get the 1200Mbps dual-band network speed between all of your connected devices. Moreover, its features are compatible with all devices, 5.8Ghz Anti-interference, wall-through, offers superior wifi speed, etc. The Comfast Wifi Extender Setup is easier than other devices. You can install it in a plug and play way. If you want to know how you can install and set it up, follow these given points.
Steps for the Comfast Wifi Extender Setup with ap.setup
- First of all, you need to install your Comfast range extender if it is new.
- Plug the Comfast Extender into the electrical socket.
- Please wait just for one minute and press its power button.
- The signal lights will blink on the range extender to show that its power starts and it’s been ready for work.
- Now, if you want to broadcast your existing wifi then you must configure your wireless router with it through the browser.
- You will open a network or wireless settings on any device like mobile phones, desktops, laptops, etc.
- Launch wifi settings and click on the ‘COMFAST_***’ Wifi network name (SSID). It’s available on the appearing wifi list. Now, you have to press the ‘Connect’.
- Oops, it may not connect with the internet, because it’s not configured with your router. The Comfast extender is connected but shows no internet connection. You will configure it through the browser.
- Launch an internet explorer on your desktop. Type IP address 192.168.10.1 or http://ap.setup in the search bar. It will instantly be led to the Comfast wifi extender setup panel.
- First, click on the router once if you wish to expand its wifi and type the “admin” name and default password. Wait for a bit, the Comfast extender resets automatically and you will reconnect its Wi-Fi using your extender’s new SSID and password.
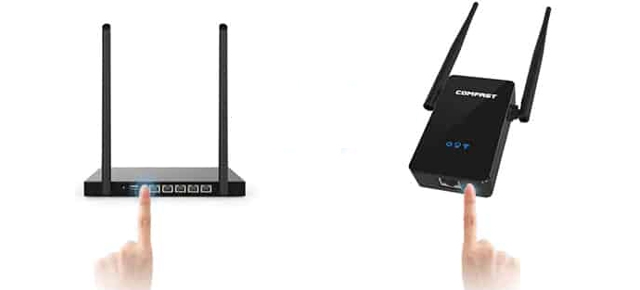
Comfast Extender Setup Using WPS
- In the beginning, configure your wireless range extender.
- Connect the Comfast extender with the power supply plug directly.
- The signal lights of the range extender will automatically start flashing, after pressing the power button.
- Now, please wait and ensure that your router has been ready for extending the internet connection and both are devices placed in a proper location.
- During the Comfast extender wifi setup with your router, you must keep both devices nearer.
- Hold your host device’s WPS button for 5 to 10 seconds and similarly, keep pressing or holding the WPS button for 10 seconds of your Comfast Repeater.
- After a minute, it starts blinking with a blue wifi signal light, which means the wifi network setup has been successfully done.
- You will be called the Comfast Network Repeater link “Home Network”.
- Now, the Comfast Extender Setup using WPS has completed suitable, you can now reposition it and where you want to get the internet.
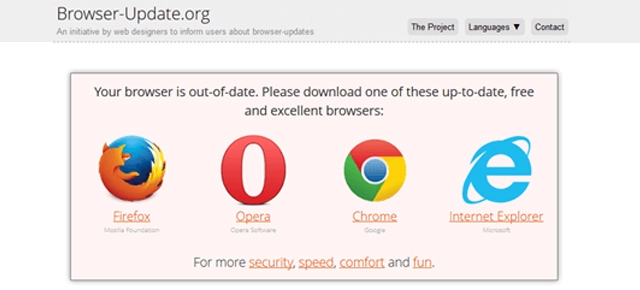
Can’t Access Ap.Setup
Following are the reasons behind not accessing or not working the ap.setup, it’s all listed below in order.
- Maybe your host wireless device will not be placed in the same place.
- Your host device network is not stable.
- Moreover, your computer is not connected to the internet and your extender’s network. Maybe it connects with the wrong SSID.
- The web browser of your computer is outdated and filled up with caches, history, unnecessary files, etc.
- When you are exploring Google’s ap.setup, maybe the internet connection is fragile or disconnected from your desktop.
- Surely, due to a typo, you will not be accessing the ap.setup and maybe your extender’s firmware is outdated.
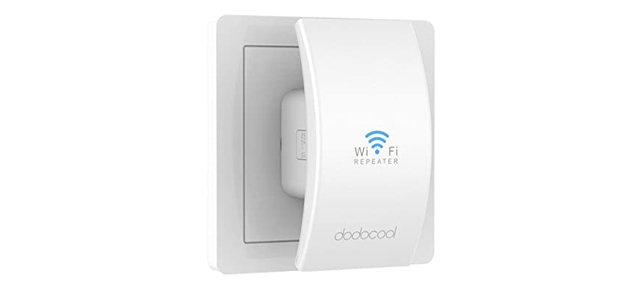
Dodocool AC1200 Extender
The Dodocool AC1200 wireless range extender is designed with the ultimate features. You can connect it with the 802.11AC standard router network connection. It’s built-in with the next-generation wifi technology. Moreover, you can get the 1200Mbps wireless network speed into your wireless devices. It transmits the wireless data three times faster than your main device. The Dodocool AC1200 Extender also brings backward compatibility features with USB that allow you to connect with 802.11 a/b/g/n standard devices. You can get into your device’s 300Mbps speed at the 2.4Ghz and 867Mbps at the 5Ghz band network. Flawless for uninterrupted HD video streaming, emailing, lag-free online gaming, video calls, surfing the Web and more. The Dodocool wifi extender setup is too easy. If you want to know about its all setup procedure, you will follow the below-given points.
Dodocool ac1200 wireless ap/repeater setup
Following are the steps for the Dodocool AC1200 Extender setup with the browser.
- Plugin the Dodocool Ac1200 wifi range extender directly in the electrical power socket.
- Start its power and when its signal lights blink, open your mobile phone.
- Go into the wifi settings and wait until the list appears on your screen.
- When the various available networks’ names are shown in the wifi networks name list, just you will find out your Dodocool Extender name from all of these devices.
- Tap on it and if it opens the network, tap on the directly “connect” option, either you have to put the password.
- Now, it will connect but shows no internet. This means your range extender is not configured with your broadcasted wireless network device.
- So, go into the browser and access the administration page of your Dodocool Ac1200 wifi range extender with an ap.setup.
- Login to your Dodocool ac1200 wireless extender account.
- After that, the Dodocool ac1200 wireless ap/repeater setup page appears directly on your mobile phone screen.
- Now, you will start the Dodocool Wireless Extender configuration process.
- Choose your main router network and set it up with your repeater by following the on-screen instructions.
- In the end, you have to save all the settings that are made by your and again connect its network to your mobile phone because it will reset once after finishing the configuration process.
Extender Mode
In the Extender mode, you can extend or broadcast the wireless network of the router without using any internet cable or wired setup. In this method, you need a WPS button. Just hold or press your extender and your router’s WPS button at the same time for a while. After this, connect both of the devices with each other without a frustrating wired connection and browser-utility based setup method. It is the easiest and time-saving wireless connection method with your router. The WPS connection helps you to extend the network signal range of your router in your home at any corner and without wifi location. In case, the ap.setup does not work due to some reason, you can try to set it up your wireless extender with the extender mode.
Access Point Mode
On the other hand, this method is the exact opposite of your extender method. You don’t need a wired connection to use this method. To use it, first, you have to confirm that your wireless range extender is suitable for plugging in the power switch. You can configure the ap mode through the browser. First, you will have to search its name in the wireless network name list. After that, if it shows no internet connection afterwhile connecting it, you will configure it through browse. Open a browser and enter https://ap.setup. You can access the admin panel to begin the setup. Once you are logged in, go to the ap setup wizard page. Henceforth, you will select the “Access Point” as your mode. Finally, follow the given instructions and steps to go ahead of the screen and finish the Access point setup process.