The Mercku M6 802.11ax Router usually adopts the innovative Wi-Fi 6 networking technology. This mesh Wi-Fi router is also known as “AX Wi-Fi” or “802.11ax Wi-Fi”. It can provide faster, high-speeds and connect Wi-Fi networks with more than twenty devices. The Mercku M6 Wi-Fi 6 Mesh Wi-Fi System 802.11ax Router provides better Wi-Fi network coverage throughout the home of up to 3,000 sq. ft. It uses the dual-Band (such as the 2.4GHz band delivers the wi-fi network up to 573Mbps and the 5GHz band delivers the wi-fi range up to 1201Mbps) using the gigabit wireless Internet mobile App management and control. Using the M6 router as a mesh system node, you can easily increase the network wi-fi range. Mercku’s convenient app is helpful to achieving all features of the M6 router such as parental control, quick management, and smart connecting features.
Installation of Mercku M6 Wi-Fi 6 Mesh Wi-Fi System 802.11ax Router
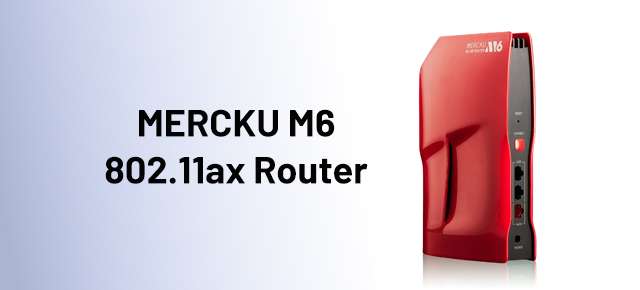
The MERCKU M6 Mesh Wi-Fi system is made up using the latest generation technology. The look of this router is very elegant and sleek. You can install this router by following the below steps.
- Unbox your router first and two expandable mesh (M2 swarm and M2 hive) get out from the box.
- It contained in package three power adapters, three ethernet cables, 4 wall-plug bees, and the queen towers.
- After unboxing, you will choose a specific location for your all Mercku M6 Wi-Fi 6 Mesh Wi-Fi System 802.11ax Router.
- After that, plug in the power adapter in the wall outlet and turn on the power of the queen tower by connecting with the power adapter to the modem.
- Then, connect the ethernet cable to your modem WAn port, and the LED light generated green color light due to connecting the ethernet cable.
- Now, connect your Mercku M6 Wi-Fi mesh with your device by accessing the Mercku M6 Wi-Fi 6 Mesh Wi-Fi System 802.11ax Router login page through the web browser.
- To amplify the Wi-Fi network signal especially in dead zones and long distancing areas you can use additional mesh nodes.
- Plugin mesh nodes in the wall switch outlet and after connecting the router network it showed the green color light.
- You can use the additional mesh network in expandable network coverage areas.
These are some steps of the Mercku M6 Wi-Fi 6 Mesh Wi-Fi System installation. You can use these steps to install your router.
Login to the Mercku M6 Wi-Fi 6 Mesh Wi-Fi System 802.11ax Router
After installing your Mercku M6 Wi-Fi 6 802.11ax Router, connect your router network with your device. Use some given below steps for the Mercku M6 Wi-Fi System 802.11ax Router login.
- Choose any device such as a computer or PC to connect to the router’s Wi-Fi network.
- If you get the wired network connection then you connect your PC with the ethernet cable.
- Then, open a web browser on your PC and type the https://mywifi.mercku.com or IP address of your M6 router.
- Buffer this address through the web browser and the web-based login box pops up on the PC screen.
- Type in the login box your M6 Wi-Fi mesh system admin username and Mercku M6 Wi-Fi 6 mesh system default password.
- After this, click on the login option and complete the M6 Wi-Fi mesh system login process.
This is the Mercku M6 Wi-Fi 6 router login steps. By using these steps you can easily access your Mercku router login page.
Setup of the Mercku M6 Wi-Fi 6 Mesh system 802.11ax Router
Using the Mercku app you can easily access the Mercku M6 Wi-Fi 6 mesh system 802.11ax router setup page. Just, follow the below steps and access the M6 Wi-Fi 6 mesh system setup page.
- Use your PC device and make sure it is connected to the Wi-Fi network.
- Then, open a web browser and download the Mercku app using the https://mywifi.mercku.com.
- After downloading the Mercku app, now you install it and use this app for doing the Mercku M6 Wi-Fi router setup.
- Open this app and continue with the sign-in option.
- Fill in the username and password to complete the sign-in credentials.
- After completing the sign-in credentials, the Mercku M6 Wi-Fi 6 mesh system setup page is automatically accessed now.
- Visit the setting menu and click on the administrative setting option.
- Follow on-screen instructions for completing the Mercku router setup.
- After completing the changes, click on the setup apply option.
- Through the wireless setting option, you can easily change your Mercku M6 Wi-Fi 6 mesh system 802.11ax router default password and username.
- Just, click on the apply option after completing the changes.
Now, the Mercku M6 wi-fi mesh system setup process is finished properly. Using these steps you can easily set your 802.11Ax router setup.
Firmware update of Mercku 802.11ax M6 Wi-Fi 6 Mesh system
If you update your mesh system firmware, this is to add some new features to your 802.11ax Wi-Fi router. Using the below steps, you can easily complete your Mercku M6 Wi-Fi 6 mesh Firmware update.
- Download the Mercku app first, from the play store or https://mywifi.mercku.com.
- Then, install the app and complete the Mercku 802.11ax login credentials accordingly.
- After login, visit the settings option and choose the firmware update option.
- Update now your Mercku M6 Wi-Fi 6 mesh system firmware by choosing the new version according to your router.
- The Mercku 802.11ax Wi-Fi 6 router firmware update process is running now.
- Please wait for a few seconds, because your router is updated and reboots after updating the firmware.
- At last, open your PC and again use your Mercku M6 Wi-Fi router network.
The Mercku M6 Wi-Fi 6 Mesh system firmware update process is properly completed. Use these steps to update your router firmware.
Review of the Mercku M6 Wi-Fi 6 Mesh system
You must follow the instructions by the Mercku M6 Wi-Fi 6 Mesh system 802.11ax router review and get all the information about this router. The Mercku 802.11ax router provides a maximum Wi-Fi speed of up to 9.6Gbps. This is enormously useful for getting the high speed of network throughout your whole home. Using this router, you can easily get a router Wi-Fi network range in dead-zones and long distancing areas. The Mercku 802.11ax Wi-Fi 6 mesh system review gets you all the proper information regarding this router.
FAQs
What can I do to Reset the Mercku M6 Wi-Fi 6 Mesh system 802.11ax router?
If you want to set your M6 mesh system factory default setting, you have to need the Mercku M6 Wi-Fi 6 Mesh system reset by using the WPS button. To reset your router first unplug the router for a few seconds. Then, again plugin this router in the wall outlet and press or hold the WPS button by using any paperclip. After three seconds, live the WPS button and again use this router by connecting the Wi-Fi network on your device.
How to troubleshoot the Mercku M6 Wi-Fi 6 mesh system is not working?
If your Mercku M6 Wi-Fi 6 (802.11ax) Mesh system is not working, then you reset your router. To troubleshoot the router, not working issues again connect Ethernet cable with your modem WAn port. You can update your mercku 802.11ax router firmware, to fix the Mercku M6 Wi-Fi mesh system not working issues.
What should I do to fix the LED light not blinking?
The Mercku M6 Wi-Fi 6 Mesh system LED light is not blinking when your router network signal is very weak and slow. To troubleshoot this problem, move your router to another location and again use your router accordingly and get a better signal of the network.
Also Read:
Google MESH Wi-Fi System Setup, Installation, Troubleshooting
ASUS AX6000 WiFi 6 Gaming Router
Mercku Mesh WiFi System M2 Hive Router Setup
Asus AX6100 WiFi 6 Router
ASUS GT-AX11000 ROG Rapture