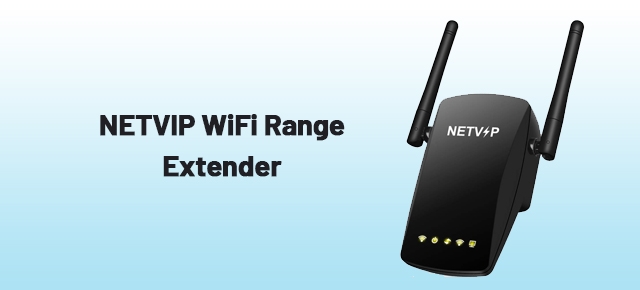
The NETVIP WiFi Extender eliminates the wifi dead spots areas using the 1200Mbps (5Ghz+2.4Ghz) dual-band technology. It boosts the wifi network range in whole-home by the AC1200 technology. The NETVIP range extender usually boosts the 5Ghz frequency of the Router. The super fast 4 high gain external antennas provide superior network stable wifi network connection between your wireless devices. It easily covers any apartment, corner, building, compound apartment, and datcha.
The NETVIP Extender delivers and transfers reliable data in your whole home including speeds up to 867Mbps on the 5GHz and 300Mbps on the 2.4GHz. It makes a strong connection by dual bands at a combined speed of up to 1200Mbps. By using the 1200Mbps network speed you use it for surfing HD video, videos chat, and online games. This is a very excellent compatible networking device. Generally, it works with 802.11 a/b/g/n/ac standards router, access points, gateway, modem, and Existing network Signal.
NETVIP WiFi Range Extender Installation
The NETVIP extender Installation is simply based on a plug-and-play function. There are some quick steps to installing it that are given below.
- By choosing a ventilating area around the location of the existing router, keep the NETVIP extender there.
- After that, you have to choose a repeater Mode for extending the WiFi coverage of an existing WiF router network.
- If you choose, AP Mode is mainly covering a wired network to a wireless network.
- Apart from this, if you choose a Router Mode then it is creating an instant private wireless network and also enabling multiple devices to share it.
- After that, connect your Extender with the power socket and then connect with the existing router’s network by pressing the WPS button.
- You can also connect your device by using the two Ethernet ports that can connect any wired device such as a multimedia player, game console, smart TV, or PC to your existing router’s Wi-Fi network, and it works as a media Bridge.
- Just turn on your PC and also connect the wifi network to it.
So, these are some steps for NETVIP extender installation. After installing it, you can easily use its wifi network in your without networking areas.
NETVIP WiFi Range Extender Login
Initially, complete the installation process and then log in to it to connect the wifi network on any devices By the below steps, you can complete the NETVIP range extender login process.
- Using the web interface, you can access the login page of the extender.
- Just open it and then search the NETVIP repeater IP address or type https://wifirepeater.org.
- After entering it, just buffer this address through the web interface.
- Now, look on your PC, the web-based login box of your repeater is automatically displayed on your PC screen.
- To the NETVIP WiFi Repeater login, enter the login credentials in the login box.
- Type username or NETVIP extender default password in the login box.
- After this finally, click on the login option which is also given on the PC screen.
Thus, these are some NETVIP extender login steps that are helpful to log in to your wifi extender easily. After the login, you can manage your device to connect multiple devices.
NETVIP WiFi Range Extender Manual
The NETVIP WiFi Repeater User Manual usually gives general instructions to users. By using it, you can know very well how to install the netvip wifi repeater and how to use netvip wifi repeater with multiple devices such as iOS, Echo, Alexa Devices, PCs, PlayStation, Android Devices, Secure Caramel, or Ring Bell, etc. It comes with a wifi repeater packaging box. It only came up with new extenders. By using the netvip wifi repeater manual, any user gets the general instructions about it. You can also know about it through the NETVIP website. To manage it properly and get the most relevant information about it follow the instructions given here.
NETVIP WiFi Range Extender Setup
First, complete the Netvip login steps to access the extender’s web-based setup page. After that, to manage it properly follow the below given Netvip wifi repeater setup instructions.
- Make sure first, the wireless range extender is plugged into a wall outlet.
- After that, you have to set it up via smartphone, iPad, or your computer, to allow you to boost your home Wi-Fi signal within minutes.
- Then, you have to go into the web management page, by using the NETVIP website or extender’s IP address.
- Now, click on the setting option to manage it, after completing the login process.
- After this, follow the on-screen instructions and manage your device according to your device.
- At last, to save all the changes, you can finally click on the “apply” option.
So, these are some ways for the NETVIP extender setup. To change your extender wireless and administrating setting, then you can follow these steps.
NETVIP WiFi Range Extender troubleshooting
Many times, the NETVIP wifi extender causes various problems. To the NETVIP WiFi Repeater troubleshooting, you have to follow the below-given guide.
- Sometimes, the NETVIP wifi repeater won’t reset. To fix it, you can reboot your extender and try resetting it again.
- If your NETVIP wifi Repeater is not showing up in the wireless networks. Then, you have to reset your device and then again find the Network Name (SSID) of your extender and connect it by using the password.
- Moreover, If your NETVIP wifi repeater won’t connect to the internet then you have to be sure that you have plugged all the wires properly.
- Many times, the NETVIP wifi extender is not working, so you have to check your device’s Wi-Fi settings. After this, again reset your device to its default settings, and connect it again.
- Apart from this, the NETVIP wifi repeater red light is also a part of the issue. It is caused due to slow network connection. To fix it, you have to move your extender near the router.
So, these are some steps of the NETVIP extender troubleshooting guide. Just, following these steps, you can also try to fix up your device issues.
NETVIP WiFi Range Extender Review
By getting many people’s suggestions and reading the NETVIP WiFi Repeater review from amazon. I bought this extender to extend and boost the existing wifi router’s network in my whole home wifi signal that reaches into my backyard easily. I used this device and it was amazing and very easy to maneuver. To connect the wifi network, you can use its three types of modes. These are repeater mode, AP Mode, and router mode. The repeater mode usually extends the Internet, access point mode creates a new access point, and the last one router mode is used and operated as a router. So, all the modes working are very amazing and I was able to access all these modes without having to struggle.
FAQs
Why is the NETVIP Extender firmware update necessary?
The NETVIP wifi repeater firmware update is most necessary to add some new features to your extender and to troubleshoot the various issues. So, you can also update your device through the web management page. Just, go into the extender’s setting and then update the firmware of it according to on-screen instructions.
Is NETVIP WiFi Range Extender Reset Procedure Troubleshooting Various Issues of Extender?
Of course yes, just resetting your device you can easily reset your Extender by pressing the reset button. You can reset your exetender by using the pin or any object. Just, hold it with your extender by using the pin. You have to hold the NETVIP extender reset button just for three to fifteen seconds only.
Can I connect the NETVIP WiFi Range Extender with Alexa?
After installing the Alexa app, you have to go into the setting from the navigation panel. Then press and hold the extender’s power button for a few seconds to connect it with Alexa. After connecting the wifi network, the light starts blinking on Alexa. Now, you can also connect your mobile or PC with the wifi network.
Also Read:
Whew Wi-Fi Extender setup troubleshooting review
What is Netgear extender IP address after setup?
Netgear wifi extender device light not on
Netgear Extender Not Working