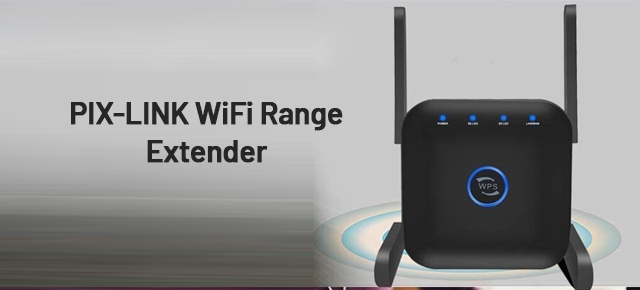
The PIX LINK WiFi Range Extender provides the 5GHz and 4GHz Dual Band WiFi network. It mainly works with any 802.11 a/b/g/n/ac standard Wi-Fi router, access point, Modems,gateways or more. Through this extender you can easily access the network speed of dual bands at a combined speed of up to 1200Mbps.Its smart 2000FT and 4 x high gain external antenna rotate the WiFi network range in 360 degrees. You can get the high-speed network connection especially for Surfing HD online video, video chats, and online games.
The Pix Link wifi range extender 4 high gain external antenna designs to eliminate the dead area and improve the existing Wi-Fi network coverage. It extends existing wifi signals in unreachable and hard-to-wire areas such as longer areas or dead-zones of your home and office. Using this extender wifi network, you can get a stable, reliable and high-speed Wi-Fi network without interruption. The Pix-Link extender is compatible with 99% router.
Steps for the PIX LINK WiFi Range Extender Installation
The Pix-Link WiFi range extender usually boosts the Existing wifi network upto 1200Mbps with Stable Signal And 360° Full Coverage. You can easily install it. Just, You have to follow the following below-given steps.
- To install the Pix-Link WiFi Range Extender, first you need to find a specific location for it, which is near your Existing WiFi router.
- Now, you have to put out the Extender from the packaging box and keep it in your chosen place.
- Before installing it, first you have to read the pix-link wifi repeater manual carefully.
- After this, you can plug your Extender into a wall socket and turn on the power of it by pressing the power button.
- When powering on, connect the extender and your router’s LAN port to the Ethernet cable.
- After accessing the network in the extender, the LED light on the gateway of the extender completely blinks the green color light.
- Now, to connect the network of the extender to your computer, you may go to the network settings of your computer.
- After this, you have to go into the wireless setting and find your device name.
- Then, click on your device name and connect to the wifi network in your computer by entering the wifi security password.
- Finally, you can verify from the network status that the wifi network is fully connected in your computer or not.
Watch Video: pix-link wifi extender setup
So in this way, your Pix Link wifi range extender installation process finishes now. You can now enjoy your Pix-Link wifi extender network to stream online videos or lag-free gaming.
Steps for the PIX-LINK WiFi Range Extender Login
The Pix-link wifi extender smart Signal Indicator is useful for finding the location for getting the proper Wi-Fi coverage. After installing it, you can access it through the Pix-link app and web browser pix-link website or PIX-LINK IP address
- For the pix-link login, First of all you connect your computer to the wifi network of extender.
- After connecting the wifi network to your computer, you have to open the web browser on your computer.
- To access the extender login page, just type in the web browser URL pix-link wifi repeater ip address or https://www.pix-link.com.
- Now, you can search this address and wait for a few seconds while the login page of your extender is buffer.
- After a few seconds, your Extender’s login page will be buffering automatically.
- You can login now, by entering the login credentials in the login box.
- Just, type in the login box your pix-link password and admin username.
- Then, finally click on the “login” option.
Thus, the Pix-link wifi range extender login process finishes now. After completing the login process, you can easily manage it through the setting option.
Pix-Link wifi Extender manual
The Pix link WiFi Range Extender manual simply gives a little description about the Extender just like as it is best for Eliminating the Dead Zones or etc. It covers up the 2000 inches wireless extended network range areas. The Pix-link manual also describes the features of the extender which is such as wifi transmission Speed upto 1200Mbps, transmission Range of wifi network Up to 2000FT or etc. Through the pixlink manual you can also know more information about this extender such as Antenna 2* 2dBi External Antennas , using Work Mode Repeater /AP, network Frequency Range 2.4Ghz-5Ghz or etc. But the Pix-link user manual does not specify the setup process clearly. So, through the below-given Pix-link instructions you can easily complete your Pix-link setup.
Steps for the PIX-LINK WiFi range Extender setup
The Pix-link Wi-Fi range extender is very Elegant and compact. You can easily manage it. If you want to change the setting of it, then follow the below given PIX LINK setup steps.
- If you want to set it up through the app, then first of all you download the Pix-Link app from the Play Store.
- After downloading the app, install it and then open it and click on the sign-in option.
- To sign in, you enter your Pix-link Extender username and password in it and then click on the sign option.
- Now, you can click on the Settings option to set the extender network directly.
- First of all, you can choose the settings option, and then choose any setting option which option you want to change.
- Now you can set your extender according to the instructions given on the screen.
- You can also do the pix-link-2.4g/pix-link-5g setup, through there.
- After making the settings, you must click on the “apply” option and then click on the Save Changes option.
So, these are some ways for accessing the Pix-link setup page. With the help of these few points, you can also access the setup page of your extender.
Troubleshooting tips for the Pix-Link Wi-Fi range extender issues
If you are facing a lot of problems with your pix-link extender, then you can solve these problems by following the below-given points.
- Many times, the Pix-link Extender does not connect to the Internet. If you want to solve this problem, then reset your extender and router. After this, your Pix-Link extender not connecting to the wifi problem will be totally solved.
- If your Pix-link WiFi extender is not working, then you can check your router wifi network connection.
- In spite of this, If your Pix-link Extender login credentials are not matched then you can fill again and carefully login credentials in the login box.
- If the Pix-link extender IP address is not loaded, then you can again verify it through the extender and put it again in the web browser and search it.
- You can also disconnect the unnecessary connecting devices from your extender to fix the Pix-link keeps disconnecting issues.
setup.pix-link.net
Below are some points that are outlined for the Pix link extender setup with setup.pix-link.net.
- Initially, plug in the Pix link extender into an electrical power source.
- Take an ethernet cable to link your extender with your router’s internet connection.
- Kindly fix the Ethernet cable on your extender LAN port and another point will be attached with your existing device Ethernet port.
- Then, you will trigger the power of both devices.
- Make sure the signal light has flashed. If it is illuminating it means it is working, if not that means the connection is not sufficiently working. So, you have to connect it again and go ahead.
- Subsequently, connect your mobile phone with its network and search on google browser setup.pix-link.net to go to its setup page.
- Prior to the Pix link setup, firstly login in by entering the Pixlink extender default username and password.
- Thus, go on the setup page and configure the settings of the Pix link extender by following the on-screen info.
- Lastly, save all which settings are modified by you.
setup.pix-link.net not working
Sometimes, the setup.pix-link.net not working due to some misconfigurations and connecting it incorrectly. So, let’s fix it by using these points, you could follow these outlined points to settle it.
- Kindly check your mobile phone and range extender network. Surely, it’s fragile due to the face setup.pix-link.net not working issue. Make your device connection robust and stagnant to troubleshoot it.
- After this, search your extender website address again and log in to your pix-link extender.
- Kindly enter the Pixlink extender username in the admin field.
- In spite of this, enter the Pix link extender default password to login satisfactorily.
- Consequently, ensure that the issue will be solved now.
Pix-link default login and password
The Pix link extender’s default login and password are useful to access the administration page of the extender. After accessing the admin page, you might be able to correctly set it up and manage the settings of the range extender without any hassle and issue. So, you must use the Pix link login and password to control its network.
How do I pix link repeater 2.4Ghz setup?
The Pix link wireless range extender is an extender that is most well and great to give the internet in your home all edges. If it is interrupted and slow then you have to maintain its network after modifying this network setting. Apart from this, it is also resolved after connecting the wireless device in a proper signal zone. Just establish it closer to your router to troubleshoot the issues. Generally, there are more than troubleshooting tips to cope with the issue but the main step to fix is to just know the reason. First of all, know the reason behind the occurrence and resolve it precisely. If you would like to know how I do this repeater 2.4Ghz setup? Then let’s follow the below-given points.
Connect the Pix Link Wifi Repeater with the power plug
The first thing is to connect the range extender with the power. If you would like to connect it with the range extender then connect it with the power. So, let’s unbox it and take it out from its packaging box. Also, read consciously all details from the user manual. The user manual generally offers you a great opportunity to get a high signal range. It is a great option for using the printer very easily. So, let’s connect it with the power supply and access the better signal range through the wireless router. First of all, plug it out into the wall outlet and acquire the high signal range through this repeater after connecting it with the router. Now, connect it with the existing wireless device to access the outstanding signal range.
Join your router internet with your repeater
If you should get the additional signal range then, first of all, keep it closer to the wireless router. After that, access to better connectivity with a proper signal range through this router gives the additional range after the connection. So, connect it with the internet connection using the extension. Either you should use the wireless connection mode. Just need to join the LAN port of the internet device with the Ethernet port. In spite of this, to get the wireless connection, just connect the extender with the power supply. After that, go into the configuration page and set the wireless network anime and password for this. Then, use it to get the impeccable signal range. Now, boost its signal range and acquire the high internet.
Visit the Pix Link Wifi Repeater administration page
Subsequently, connect your wireless range extender with the internet connection. To connect it with the internet, just use your existing device password and access its internet. After this, search into the browser to locate its administration page. Then, enter the details to log in. So, log in and accomplish the login process. Then, succeed on the web page to acquire better internet speed.
Go on the pix link repeater 2.4Ghz setup page
If you would like to acquire the high signal range then you should log in first. After this, enter the details to move on to its settings section. Through its setup page, just click on the frequency settings., then you have to enable the 2.4Ghz band internet. it supplies a better internet connection with the proper signal range.
PIX-LINK WiFi repeater review
I have been in need of a good range extender for a long time, but I have not found any such extender yet. I am always struggling with the wifi network problem on the second floor. My Existing wifi router is kept on the first floor. This is easily connected into the first floor. But after moving into the 2nd floor, we got strong wifi over the entire 2nd floor plus the 3rd floor. So I asked a lot of people and they had suggestions for many of their extenders, they also recommended me for the P-Link Wifi range extender. After asking from many people, I chose Pix-Link Extender and bought it. From this wifi range extender, I am fully satisfied and I get full of strength in my 2nd and 3rd floor easily.
FAQs
What can I do for the pix-link firmware download?
Just, open the setting menu of the Pix-link Extender. After opening the settings page, find the pix-link firmware update option and click on it. Now, by following the on-screen instructions, you can update your Pix link range extender firmware accordingly.
How to reset PIX-LINK WiFi repeater?
If your extender is powered on, then press the Pix-link reset button by using any paper-clip. You can hold it for 30 seconds and. While you have to hold the reset or WPS button of the extender then, you can unplug your device just for thirty seconds, after resetting it, you can again turn on the power of your device. Now, the Pix-link range extender reset properly.
How to connect the pix link wireless-n wifi repeater?
Just, keep the Pix-link range extender near the location of the router. After that, using the Ethernet cable connects the both device’s LAN port. Now, You can verify through the LED light that the network is accessing or not. If network access then lED light fully blinks the green color light and if it is not accessed then it blinks the orange light.
Read More:
NEXTBOX wifi extender