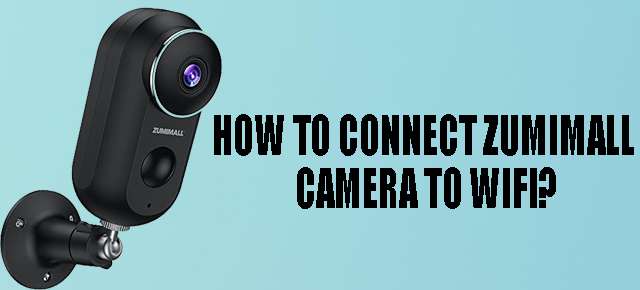
If you are exploring how to connect a Zumimall camera to a WiFi network? Don’t think too extensively. You have just opened the precise page. This page will guide you on how to connect the Zumimall camera to WiFi. On this page, you will discover some simple methods, step-by-step, by which you will be capable of connecting your security camera to a WiFi network. As well, the most prominent godsend of connecting a security camera to a WiFi network is that you can probe the status of your home or office from afar and also hear the voice.
Moreover, the Zumimall security camera is a wireless outdoor camera that is more impeccable for your smart home and office. In addition, it is equipped with a 36mm lens residential that offers more clarity and high-resolution 1080P images. The topmost feature of this IP camera is infrared lighting, ICR infrared filter, and an anti-reflection panel that allows night vision up to 55ft. Ordinarily, the Zumimall wireless outdoor security camera is a built-in speaker and 360° noise-canceling hypersensitive microphone that you can handily communicate with your family members. With the zumimall camera app, you can ingeniously communicate with your husband, baby, postman, or uninvited people no matter where you are.
Simple Methods for connecting Zumimall Camera to WiFi
Do you know that your Zumimall camera is compatible with the WiFi network? Yes, the Zumimall security camera is compatible with a 2.4GHz WiFi network. Now you are digging how to connect it and what is its method. There are two methods to connect the Zumimall camera to the WiFi network.
- With the Zumimall IP camera app
- Through the Ethernet cable
Connect the Zumimall camera to the WiFi network with app
You can also connect the Zumimall camera to the WiFi network with the App. Given below are some steps to connect an IP camera to a WiFi network with the app.
Download and install App
First and foremost, you have to install & download the app. To download & install the app on your Android phone, open the Google Play TM and search the CloudEdge app. When the search process is concluded, tap the install tab. Additionally, the zumimall camera app for iphone, open APP StoreTM and get it. Furthermore, you can also install and download the CloudEdge app by scanning the QR code on your smartphone. Afterward, you have to enable CloudEdge to get the mobile internet data, otherwise, it will fail to connect to a Zumimall camera.
Account registration
Next, you have to register for a CloudEdge account. To register the zumimall security camera app, launch the CloudEdge app on your smartphone. When the app is open, you will notice the Welcome screen. If you have an account, tap the zumimall camera login tab, and typewrite the username and password. In addition, you can readily create an account by tapping the sign-up tab. New users need to sign up by Facebook/email and follow the steps to finish the account registration.
Add Zumimall camera to the App
When the account registration process is finished, you have to add a zumimall security camera outdoor wireless to the CloudEdge App. Before adding the camera to the mobile app, insert a Micro SD card into the camera. You will witness the + icon on the home interface of the app, then tap on it. Then, you have to pick the Zumimall camera and tap on Next.
Connect Zumimall camera to WiFi
After adding the Zumimall camera to the CloudEdge app, you can conveniently connect the security camera to the WiFi network. As soon as you add the camera to the app, you will notice a pop-up notification. In this notification, it will be that you want to connect the camera to the WiFi network, if yes then tap on Yes. Next, you have to input the WiFi password and Network name, tap the connect tab.
Congratulations! These are steps to connect the Zumimall security outdoor camera to the Wi-Fi network with the app.
Connect Zumimall camera to WiFi network with Ethernet cable
If you endeavoring to connect the Zumimall camera to the WiFi, but the zumimall camera won’t connect to wifi error. So, in these circumstances, you can connect the camera to the WiFi network with an Ethernet cable.
Place your Zumimall camera & DVR within WiFi range
To connect the camera to the WiFi network with an Ethernet cord, initially, you have to place the camera within network range. Your security camera should not be out of range of WiFi. With An Ethernet cable, your camera is connected to the WiFi network via DVR. So you should install a DVR near the WiFi network.
Connect the Zumimall camera to WiFi
To connect the Zumimall camera to the WiFi network with an ethernet cable, firstly power off the camera and router. Now you have to unite the LAN jack of the DVR to the LAN jack of the WiFi router. You can handily unite these LAN jacks by uniting the end of the Ethernet cord. After this, you have to turn on the power of the camera and the Wi-Fi router.
Thus, this is the way to connect the Zumimall camera to a WiFi network with an Ethernet cable.
Zumimall camera not connecting to WiFi network? Know reasons
If your Zumimall wireless outdoor camera is not connecting to the WiFi network, then try to deem the reasons.
- Your Zumimall security camera may be out of range of the WiFi network
- The feasible reason is zumimall camera not turning on
- In the app connection, the version of the app may be out of date.
- In the Ethernet cable connection, the Ethernet cord may be broken or unusable
- The zumimall camera firmware update may be out-of-date or corrupted
After knowing these aforementioned reasons, maybe the problem will be solved. In addition, these reasons will help to resolve the “Zumimall security camera not connecting to wifi” error.
Also Read:
Why Won’t My Zumimall Security Camera Connect With My Router?
Ring camera not connecting to wifi
Does Blink Indoor Cameras Work With Any Wifi Network?
Ring camera not working
Blink Mini Camera